Search This Blog

Saturday, November 15, 2014


I did the St Teresa of Avila vendor event last night, and at first I wasn't sure how it was going to go...a lot of looks, and "oh this is cute" etc...but my first sale came after 45 min into the evening...A few of the other vendors felt that the layout could have been better and to not have the big raffles when you have vendors because by the time people have spent their money on the tickets for those items, there was nothing left for the little guy.  I could see their point, but also those big raffles drew in the customers.  so I felt it was like a double edge sword.  But I kept smiling, and talking to people.  some said "oh I'll be back" but I didn't hold my breath-I've already learned my lesson on that one...however there was one that actually DID come back-her son wanted one of my mini journals. (it was rather sweet).  My big sellers of the night were my snowman tealights ($3 each) and the big wooden clothespins ($3 each).  Until it was just about 10pm and I was starting to pack up....  and this totally made my night!
    a group of 3 women came up and were admiring my items (I only managed to pack up a couple things).  One looks at my stuff and says: "Are you the Crazy Penguin Lady"?  I had to laugh.  I said, Yes I am.  She said her friend follows me and loves my stuff.  It was weird (in a good way) and she looks at me and says "feeling kind of stalked, don't you"?  LOL  it was funny.  I said I'm always happy to hear when people talk about my items and rave about them.  They saw my gift card cases and fell in love with them!  One bought 3 on the spot... and the best part: I got a custom order for 14. YES..FOURTEEN of them!!!!!
   I nearly packed it up early (a few other vendors did) and I am very glad I didn't.  I know not every vendor event is like this...but I am very glad I did this event.   I did get a few contacts, so that was a good thing too. 

Tuesday, November 11, 2014

Treat jars

As you read yesterday, I've been quite busy prepping for some upcoming vendor events.  Here are some other treats I've been working on....

Treat Jars.  These jars are from IKEA.  They're small and a great deal!  I wrapped the lids with All is Calm washi tape from Stampin' Up!  Then I punched a 2" circle from Lost Lagoon card stock.  The stamped image is from a retired set from Stampin' Up!  Tags till Christmas.  I then used some Lost Lagoon satin ribbon around the neck of the jar.  They will get filled with candy and then they're ready to be sold. 
 a close up...
Thanks for stopping by!

Happy Stamping!

Monday, November 10, 2014

Gift Card holders


Hello there!  I've been a bit busy recently prepping for a few upcoming vendor events.  One item I have been working on are some gift card holders.  Here are a few of them closed.  I used the Stampin' Up! wood mount half cases.  They came together nicely!


Here are the insides:
On the left side when you open it is the Stampin' Up! gift card envelope.  It's a great little framelit.  It's mounted to the case with SU Sticky strip.  On the right side is a little extra gift for the recipient; A set of four 3x3 coordinating note cards with envelopes and 6 Hershey nuggets wrapped in coordinating SU DSP.  This set used the Stampin' Up! All Is Calm DSP and colours.

Here is a close up of the note cards:


Here are the insides for the green/red sets.  


 Thanks for stopping by.  I hope you enjoyed seeing these. 

~Happy Stamping!

Wednesday, October 15, 2014

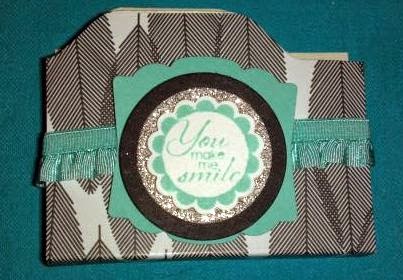
Mini Post-It File Folder


I made a bunch of these last weekend, and I've gotten a few requests on how I made them.  So I'll try to break it down.

First take a piece of card stock.  You'll want it to be 2 1/2" x 4 1/2".  This will require a little pre-planning, because before you punch and score, you'll want the DSP on the front already.  So coordinate your card stock and DSP ahead of time.  Cut your DSP to the same size and attach with adhesive.  I used the SU glue stick to get even coverage-without buckling the paper.

when that is done, score it on the long side: 2 1/8" and 2 5/8"


Then grab your SU envelope punch board.  On one side of the short end, punch it at 2"  flip it over so the end that you just punched is at the 2 1/2" and punch again.  This is what it should look like.  You'll then repeat the same thing on the other side.  The tab that is at the 2 1/2" side will then be trimmed off:


Place the mini post it note on the larger side.  When you hold it closed, you'll see one side is slightly larger-this will accommodate the post it note pad and not stick out.


Then decorate.  the larger side will be the side you will attach the post it note pad. 


I hope you have found this easy to follow.  It really is easy and you can make a bunch of them rather quickly.

Happy Stamping!!


Sunday, October 5, 2014

World Card Making Day 2014

What a nice weekend! I had scheduled my World Card Making Day event for Saturday, but sadly no one was able to come-except one person on Sunday.  That was not a problem, so of course I took that time to skype-craft with my friend at Doodlebird Designs. We always have a great time skype-crafting.  I also have an upcoming Christmas Bazaar, so I needed to work on some items for that.

I started with these:
Pop up gift card holders
I used the new Stampin' Up! White Christmas stamp set and water coloured them.  Such a subtle effect and perfect for the Stampin' Up! All Is Calm DSP.   I love the stamp set-it's a photopolymer set, which made lining up the different elements nice and easy!


Thanks for stopping by :)

happy stamping!

Saturday, September 13, 2014


I have my team meeting today, and our swap theme this month is from the Holiday Catalog. So while skype-crafting with my friend in the UK, I made this. I really like how it came out. I made 10. It uses the Holiday Home stamp set/framelits, (yes I fussy cut the ghosts), in-colours: Blackberry Bliss, Mossy Meadow and Whisper White, Basic Black and Crushed Curry card stock. Crushed Curry and Whisper White embossing powder, the special stamp set: Good Greetings.

Thanks for looking and happy stampin' :)

Monday, September 1, 2014

Holiday Mash Up!

Back in the beginning of the month I did a Christmas Card Stack.  (which I still need to blog)...oops.  But I wanted to do something with the release of the new Stampin up Holiday Catalog.  OH MY GOODNESS... 50+ pages of absolute deliciousness for the holiday season!

So of course I needed a name for the class...and since I didn't want to just do one holiday, I did the three that are coming up...Halloween, Thanksgiving and Christmas...so Holiday Mash Up was born.

I decided to offer cards and projects because like I said- the Holiday Catalog is FULL of delicious goodies!  And I wanted to let my guests try a variety before they ordered.

So here we were...

This little fella was waiting for my guest.  I made it from an idea I saw on Pinterest and filled it with some chocolates (you gotta have some chocolate when you're crafting in the Igloo)!

He came together rather quickly, so I can definitely see me making more for future events to welcome my guests.

Then we started on the projects and cards for the day...  Halloween first.

I really like how versatile the Stampin up Curvy Keepsake die is:
Not only did I make the penguin above with it, but we also made this:
A really cute pumpkin.  we sponged the sides using an oval piece cut from the SU oval framelits.  It gives it a nice effect and dimension (and best of all-it doesn't have to be perfect) ;)

Then we moved onto another treat box:
This came together quick and easy as well.  And even though it is small (2"x2") it still holds a lot of treats!

The card we made came out really cute as well...
I saw this on Pinterest, and just changed it up a little.  I love how the new in-colours Tangelo Twist and Mossy Meadow are perfect for Halloween!  Add a little Basic Black and Whisper White- and Voila!

Thanksgiving:
Although we are (or should be) thankful all year round, I thought a nice little Thankful Journal would be appropriate for one of the projects:
It uses the new For All Things stamp set, scallop tag topper punch (big catalog), new in-colours: Blackberry Bliss, Hello Honey, Crumb Cake seam binding and linen thread (big catalog). Stampin Up! also has a 2 pack of journals.  (I will be doing another idea with this as well)

We  made a set of 4 note cards using the For All Things stamp set: I cased the first card from an idea from Brian King- Stamp with Brian  His card looked more square, but I adapted it for a notecard.  I used Crumb Cake Cardstock for the base, Soft Suede, Smoky Slate and Whisper White card stock.  For the ink, I used Smoky Slate and Soft Suede.
 For the 2nd card, I used the same card stock, just made it horizontal.  The ink we used was Smoky Slate, Crumb Cake and Soft Suede.

They came out really well, and are perfect for just adding a little note and popping in the mail.

CHRISTMAS:
Back to using the Curvy Keepsake die, and an idea from Pinterest- we made these cute little Santa boxes.  They'll be cute to hold little gifts or treats.

Another stamp set we used-Bright and Beautiful.  It has coordinating framelits and it's so pretty
I thought it would look really nice as a 'formal' looking card.  We used Night of Navy, Very Vanilla, Silver and Cherry Cobbler.

and for a fun card, I cased this from Dawn's Stamping Thoughts but added my own touch to it.
We used the Festival of Trees stamp set and coordinating tree punch, All is calm embellishments, All is calm DSP, Christmas Bliss stamp set, Lost Lagoon, Silver, Pear Pizzazz ink, Pear Pizzazz, Lost Lagoon and Whisper White card stock.  I really like this one.  It's one of my favourites.


How would you like to get an exclusive FREE stamp set from Stampin' Up!?   From now till Oct 31, if you have a class and it's $300 (before shipping/tax) then you can get the exclusive Good Greetings set!  See the flyer below, and contact me if you have any questions or want to have a class/party at your house.
Thanks for stopping by....and Happy Stamping!